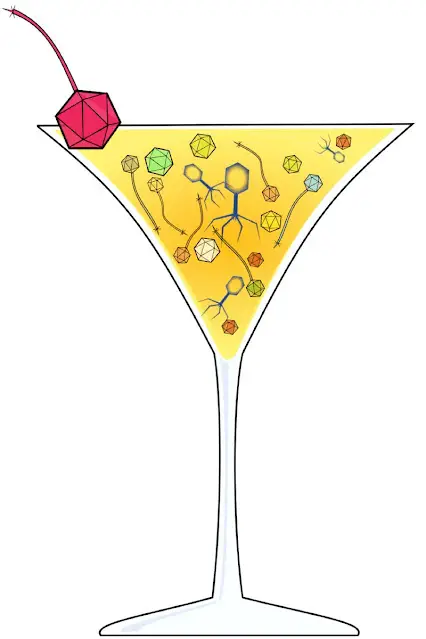
The Phage

Menu

Category: PREPARATION

How is a phage cocktail prepared?

Phage cocktails are an innovative solution for treating bacterial infections. They are a mixture of two or more purified bacteriophages, which are viruses that infect bacteria. This combination of different phages expands the host range and increases the efficacy of the treatment compared to monotherapy with a single phage. In this article, we will delve into the concept of phage cocktails, discussing the advantages and benefits of this approach, as well as outlining the steps involved in making a phage cocktail and the key factors to consider when formulating one. Additionally, we will compare phage cocktails to antibiotics and examine how they offer a safer and more targeted alternative for treating multidrug-resistant bacterial infections

Phage Cocktail: An Effective Solution

A phage cocktail is a mixture of two or more purified phages of different traits. The purpose of the cocktail is to broaden the therapeutic potential of phages against specific bacterial diseases and prevent phage-resistant bacterial mutants. Phage cocktails tend to be more efficient compared to single phage preparations, as they increase the host range and reduce the time taken for a bacteria to be killed.

How is it Made?

The phage cocktail is made by pooling equal volumes of each purified phage preparation at a specific concentration. Scientists often prefer the step-by-step (SBS) preparation strategy, as it is more effective in reducing bacterial mutation frequency and has excellent therapeutic potential for multidrug-resistant bacteria infections.

Steps involved in the development of phage therapy strategies. In the phage characterization step, text in green and red correspond to desirable and undesirable characteristics in a phage for therapeutic applications. Abbreviations: SBS method, step-by-step method. By Fernández et al. (2019).

Considerations When Making a Phage Cocktail

When developing a phage cocktail, it’s crucial to consider several factors to ensure its efficacy:

  • Purification of all candidate phages
  • Independent testing and characterization of all candidate phages
  • Screening for undesirable genes
  • Knowledge of the concentration of phage candidates
  • Virulence of all candidates

Advantages

  • Broad host range compared to individual phage candidates
  • Clearing of phage-resistant mutant bacteria
  • Production of a hybrid of good traits from individual phage candidates
  • Increased efficiency and reduced time to kill bacteria
  • Increased antibiofilm potential
  • Improved preparation stability

Bacteriophages have shown to be a promising alternative to antibiotics for the treatment of multidrug-resistant bacterial infections. Phage cocktails, specifically, have proven to be medically superior, providing a broad host range and helping to clear phage-resistant mutant bacteria. It’s essential to consider various factors when making a phage cocktail to ensure its efficacy, and its advantages include increased efficiency, reduced time to kill bacteria, and improved preparation stability.

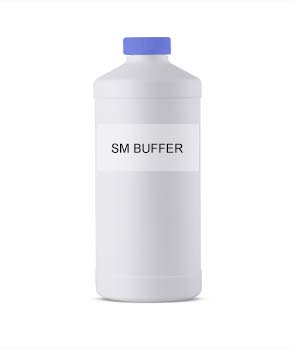
Preparation of SM Buffer with gelatin (lambda diluent)


SM buffer with gelatin is a commonly used buffer solution for various cellular and biochemical applications. It is a versatile buffer that can be used for cell lysis, protein extraction, and as a stabilizing agent for cell suspensions. The preparation of SM buffer with gelatin involves mixing the following components in distilled water:

Ingredients:

  • NaCl (150 mM)
  • MgSO4 (10 mM)
  • KCl (5 mM)
  • Na2HPO4 (10 mM)
  • KH2PO4 (10 mM)
  • Gelatin (0.5%)

Procedure:

  1. Dissolve 150 mM NaCl, 10 mM MgSO4, 5 mM KCl, 10 mM Na2HPO4, and 10 mM KH2PO4 in distilled water.
  2. Adjust the pH to 7.4 using NaOH or HCl.
  3. Sterilize the solution by filtration or autoclaving.
  4. Add 0.5% gelatin to the solution and mix until dissolved.
  5. Store the SM buffer with gelatin at 4°C.

Note: Gelatin should be added just before use, as it can cause the buffer to become turbid over time. Also, the concentration of gelatin can be adjusted depending on the specific application and requirements.

To prepare one liter follow this

To prepare 1 liter of SM buffer with gelatin, dissolve the NaCl and MgSO4·7H2O in 800 ml of H2O; add the Tris-Cl and gelatin; and adjust the volume to 1 liter with H2O. Sterilize the buffer by autoclaving for 20 minutes at 15 psi (1.05 kg/cm2) on a liquid cycle. After the solution has cooled, dispense 50 ml aliquots into sterile containers. SM buffer with gelatin may be stored indefinitely at room temperature. Discard each aliquot after use to minimize the chance of contamination. To prepare SM Buffer without gelatin click here and to prepare Tris-cl click here

ReagentAmountFinal concentration
NaCl5.8 g100 mM
MgSO4·7H2O2 g8 mM
Tris-Cl (1 M, pH 7.5)50 ml50 mM
Gelatin (2%, w/v)5 ml0.01% (w/v)
H2Oto 1 liter 
Table showing the ingredients to make one liter of SM buffer with gelatin
SM BUFFER Bottle
Prepared commercial SM BUFFER

Preparation of LB (Luria-Bertani) agar

Luria-Bertani is the most preferred media to be used in phage research. This protocol describes how to make 1 L of Luria-Bertani agar (also known as LB agar) for the culturing of bacteria on plates. 

ready-made Luria Bertani Agar plates

Procedures/Steps

  1. Add 25g LB broth, Miller, and 15g agar (or 40g LB agar, Miller) per liter of water.
  2. Mix well by inverting the bottle several times until powder is dissolved.
  3. Mix well by inverting the bottle several times until powder is dissolved.
  4. Sterilize by autoclaving for 20 min at 15 psi (1.05 kg/cm2) on a liquid cycle.
  5. Following autoclave (while media are still liquid but cool enough to safely handle bottle) pour LB agar from the bottle into plates within a laminar flow hood. Allow ~50 mL per plate. The LB agar bottle must only be opened and the plates poured in a laminar flow hood to prevent contamination.
  6. Leave plates in a laminar hood until agar sets (~30 mins).
  7. When agar has set, replace the lid, invert plates, and store in an air-tight bag at 4 °C.
  8. Plates should be removed from 4 °C at least 1 h before use and placed in 30 °C incubators. To prevent condensation from the lid dropping onto the agar surface, wipe lids dry with Kim wipe and store plates inverted.

Reminder: only remove lid from LB agar plate while in a laminar flow hood to prevent contamination.

Bacterial Stock Culture preparation

Procedure

  1. Prior to the procedure, a stock culture of the phage target bacteria should be maintained on any general media preferably Trypticasein soy agar(TSA), Nutrient Agar, or Luria agar (LA) plate ( The cell wall composition is one of the most important factors providing attachment sites for phages. For example, phages-teichoic acids attach to the outer surface of the wall which is like a landing pad for viruses that infect bacteria. The selection of media for each bacterial species should be considered carefully before starting the protocol of training phages for enhanced properties, as these play a major role by providing optimum nutrient and growth environments for the target host to create a suitable phage-host interaction).
  2. Inoculate 1 loopful of the bacteria into a 100 ml Erlenmeyer flask containing 10 ml of LB (supplemented with 10 mmol l-1 CaCl2.2H2O) at pH 7.2 ( The basic requirement of all phage culture media is that these should include the source of energy, the source of carbon, and the source of trace and major elements. The pH, growth temperature, and oxygen tensions are further

    requirements that should be considered to suit the needs and limits of the desired phage amplification. For many phages, the optimum pH range is 6.57.5 and the optimum growth temperature is about 2537 °C).

  3. Incubate for 18 h at 37 °C in an orbital shaker [200 revolutions per minute (rev min-1)].
  4. One ml serial dilutions prepare in LB (supplemented with 10 mmol l-1 CaCl2.2H2O).
  5. The cell concentrations used in this study are estimated as 101, 102, 103, 104, 105, 106, and 107 colony-forming units per milliliter (CFU ml-1)

Preparation of anti-phage agent


Procedure

Immediately prior to use, transfer 3.3 ml of 13% PRE added to 7 ml of freshly prepared ferrous sulphate solution (0.01%). After about 30 s the colour of the mixture changes to greenish then to black. These mixtures of ferrous sulphate and PRE should be protected from light. 
NOTE: The mixture is active for 45 min after preparation.

Preparation of 13% Pomegranate Rind Extract (PRE)

 Procedure

  1. Blend pomegranate rind in distilled water (25% w/v) and boil for 10 min.
  2. Centrifuge (20,000xg, 4 °C, 30 min) (A further purification of the pomegranate extract can be achieved by membrane filtration).
  3. Autoclave supernatant (121 °C, 15 min) and cool.
  4. Store at −20 °C.
  5. Prior to use, mix 1.3 ml of stock solution of PRE (25% w/v) with 8.7 ml of Lambda buffer. The final PRE concentration is 13% (see Note 1.4.2).

Preparation of SM buffer (lambda diluent)

SM buffer is primarily used in biology laboratories, and its main function, like any other buffer, is to stabilize the pH. That is, it can withstand minor pH changes, increasing the stability of biological materials or molecules. When performing an experimental task, it is critical to keep all other variables constant and only vary the tested variables. This emphasizes the significance of keeping the pH stable through reliable and consistent methods such as buffer systems. SM buffer is one of them and is used for routine phage suspension manipulation. You can make SM buffer with or without gelatin. During storage, the gelatin in SM buffer stabilizes phage particles.

SM buffer container-preparation of SM buffer

Preparation of SM Buffer

Content

Reagent Amount  Final concentration
NaCl 5.8 g 100 mM
MgSO4·7H2O 2 g 8 mM
Tris-Cl (1 M, pH 7.5) 50 ml 50 mM
Gelatin (2%, w/v) 5 ml 0.01% (w/v)
H2O to 1 liter

Procedure

To prepare 1 liter of SM buffer with gelatin, 

  1. Dissolve the NaCl and MgSO4·7H2O in 800 ml of H2O; 
  2. Add the Tris-Cl and gelatin,
  3. Adjust the volume to 1 liter with H2O. 
  4. Sterilize the buffer by autoclaving for 20 minutes at 15 psi (1.05 kg/cm2) on a liquid cycle. 
  5. After the solution has cooled, dispense 50-ml aliquots into sterile containers.

Storage condition

SM buffer with gelatin may be stored indefinitely at room temperature

NOTE: Discard each aliquot after use to minimize the chance of contamination

Preparation of Phosphate Buffered Saline (PBS)

Phosphate-buffered saline (abbreviated PBS) is a buffer solution commonly used in biological research including phage work. It is a water-based salt solution containing disodium hydrogen phosphate, sodium chloride, and, in some formulations, potassium chloride and potassium dihydrogen phosphate. The buffer helps to maintain a constant pH. It is commonly supplied as a tablet ready to dissolve to produce the desired concentration.

Content

Concentration

Phosphate buffer 10 mM
Sodium chloride 137 mM
Potassium chloride 2.7 mM
Distilled water 100 mlPrey on gram-negative bacteria only

Procedure

Dissolve one tablet in 100 ml of a 1X solution. 1X PBS solution contains10 mM phosphate buffer, 137 mM sodium chloride, and 2.7 mM potassium chloride. Each tablet prepares a 1X PBS solution when dissolved in 100 ml of distilled water H2O. Adjust the pH to 7.2 with HCl. Dispense the solution into aliquots and sterilize them by autoclaving for 20 min at 15 psi (1.05 kg/cm2) on a liquid cycle or by sterile filter membrane 0.45 lm units. Store PBS at roomtemperature.

How to make an outstanding media (agar) plate

Whether they contain TSA, MHA, LB, M9, or any other medium, making agar plates is a simple procedure. But there are a few finer points that will kill your experiment, make a mess, or just cause you inconvenience if you get them wrong. So let’s put on the record exactly how to make the perfect agar plate for those of you who are new to the world of working with bacteria.
media preparation
media preparation

Follow these steps, and you’ll get great, or even perfect, agar plates – with no lumps, bubbles, or excess moisture – every time.

Some Tips for Pouring Perfect Agar Plates Every Time

1. Use a Recipe

Make up the medium according to the recipe, then add the desired amount of agar (normally about 1% w/v) and stir. If you autoclave without stirring, with the agarose still floating on top of the liquid, you get an agarose cake in the medium. Interesting, but useless.

When making up the agar, only use 3/4 of the bottle’s volume. This allows space for bubbles to rise while the agar is melting in the microwave (and saves you cleaning up overflowing agar from the microwave!).

2. Autoclave

Autoclave your medium for 25 minutes. After autoclaving, you can, of course, store the medium-agar mix in a toughened glass bottle, then melt it in a microwave or water bath when needed. Make sure you use toughened glass bottles, or disaster can strike.

3. Cool It!

Cool the medium-agar mix to 55°C. For routinely consistent results, do the cooling for a couple of hours in a 55°C water bath. Agar starts to solidify at about 50°C. Using the water bath means you can consistently cool the mixture above the solidification temperature.

Before I used a water bath, I used to just cool it in the air but would inevitably forget about it and come back to find solidification had already started – lumpy plates are no good for spreading!

4. Supplement It

You can now add any antibiotics or supplements and be confident that the agar is at a suitable temperature because you have cooled it in the water bath.

5. Pour the Plates

Use about 30 mL of the agar-medium mix for each plate when using a 100 mm diameter plate. The less agar-medium mixture in each plate, the more quickly they dry out. 30 mL is a good amount for long-term storage; 10–20 mL is fine if you will use the plates relatively soon.

For consistency, I’d recommend using a serological pipette. Suck up 2-3 mL more than you need to minimize blowing bubbles into the plate.

6. Let It Set

If there are any bubbles in the plates, briefly pass the flame over to pop them. Classic error: trying to move the plates before they’ve set is just asking for trouble. Just leave them alone (and maybe admire your perfect agar plates while you wait)!

7. Get Dry

Dry the plates in the laminar flow hood with the lid slightly off for 30 minutes (or in a 37°C incubator for 2–3 hours, or room temperature for 2–3 days). Drying the plate is very important for storing the plates and growing colonies.

If you don’t dry the plates, the moisture will evaporate and condense on the lid during storage or incubation, giving you horrible wet plates. At worst, the humidity can affect the plating of your cells. Use a timer to remind you when the 30 minutes are up as – in my experience – it is straightforward to forget about your plates and come back to find your plates have turned into agar crisps/chips. Tasty.

8. Use It or Store It

Once you’ve poured your perfect agar plates, you can use them immediately or seal them for later use. You can use Parafilm or pop them in the bag that the plates came in for easy storage. Store the plates at 4°C. Guidelines suggest using agar plates within approximately 2 to 4 weeks.

Depending on the additives you have included, the shelf life of the prepared plates might be shorter – make sure you check this before you start so you don’t end up wasting your time (and resources) making too many plates.

A quick way to label your plates is to have a color code for each antibiotic and medium type you tend to use (e.g., red for ampicillin, black for kanamycin, green for LB, blue for M9). Stack the plates and use the appropriately colored lab marker to draw a line down the whole stack. Make sure you keep the color code to hand, though.

Now you should have perfect agar plates every time. If you’ve got any other ideas or additions to this protocol, please leave a comment.

For more protocols, please visit The phage protocols by clicking here

Phage work can be done using many different media depending on what is available to the researchers doing the experiment, although LB and TSB (A) are the most preferred.